Model Description
Introduce the concept of a frame and use a good free body diagram and the equations of equilibrium to solve for the forces and reactions acting on the frame. This demonstration should take 5-10 minutes.
Engineering Principle
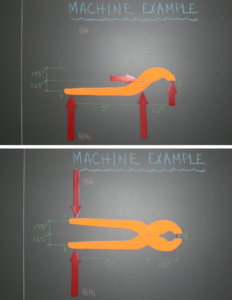
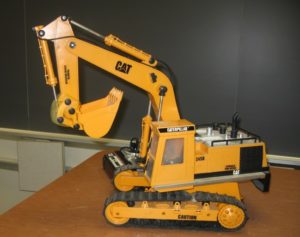
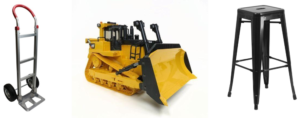
Frames and Machines are one way to classify a structure. As opposed to Trusses, Frames and Machines are comprised of at least one multi-force member. The difference between a Frame and Machine lies in the fact that a Machine uses moving parts to transmit forces and a Frame has no moving parts. Once you have introduced these definitions, it is good to show multiple examples of each interspersed with some that are not frames or machines. Bring as many examples to the class as you can find. Thereafter, talk about the techniques for solving for the forces acting on a frame comprised of members connected with frictionless pins (no moment transfer). This type of frame is used in order to be able to solve some simple structures and reinforce the concept. Introduce the concept of “pulling the pins” on this type of frame, drawing isolated free body diagrams of each of the members, and drawing in the equal and opposite pin reactions on each part of the free body diagram. If able, have several different Frames and Machines connected by pins that can be physically disassembled to use on the board or as hands-on physical models to hand around class. At this point we can solve for the forces acting on the structure using the equations of equilibrium on each of the member parts.
What You Need
| Item | Quantity | Description/Clarification |
|---|---|---|
| Frames and Machines | As many as you want | Pick as many or few as you would like. There are very few restrictions. |
| Model of Pliers | 1 | The pliers model should be made of durable material and have magnets attached to its back so that It can be fixed to the board. It also should have the ability to be disassembled and isolated to solve for the pin forces. $15; 30 minutes |
How It’s Done
Before Class: None.
In Class: One of the simpler examples to demonstrate the concepts discussed above is a pair of pliers. It is fairly simple to build and one can usually find a few pairs of old pliers that could be disassembled to hand around the classroom. Start with the example on the board with the pliers together and ask the students to classify it. Then ask how we would determine the force acting on the bolt given this free body diagram. Since we could not, use our new technique of pulling the pins to determine all the forces acting on each of the members. Taking the pliers apart on the board simplifies the time required to draw a Free body diagram, but also leads to better understanding of the equal and opposite forces involved in the pin connections. Then look at one of the parts of the pliers and apply the equations of equilibrium to it and solve for the forces at the pin connection and at the bolt. After this example, more complex frames can be tackled with ease.