
Model Description
This is a simple demonstration of the basic principles of internal fluid flow and can also cover major losses. The demonstration can cover concepts such as conservation of mass, volumetric flow rates, flow regimes, use of the Moody Chart and major head losses. This demonstration should take 10 minutes.
Engineering Principle
Internal flow is based on fluid moving through a pipe, duct or conduit. It is something we all experience in everyday life and do not think about. Instead of working on a sample problem in class with no physical relevance, this demonstration reinforces the basic principles of pipe flow, including volumetric flow rate, Reynolds number, friction factor and head loss. The basic equations required are:


What You Need
| Item | Quantity | Description/Clarification |
|---|---|---|
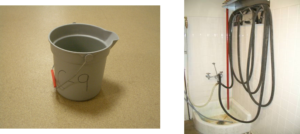
| Bucket | 1 | Bucket must be accurately labeled so that it can measure volume (check the manufacturer’s marks to make sure they are correct!). |
| Hose | 1 | Any garden hose will work |
| Ruler or micrometer | 1 | Used to measure the inside diameter of the hose. |
| Stopwatch | 1 | Used to measure the time to fill the bucket to a pre-selected volume. |
How It’s Done
Before Class: Find a utility closet or faucet where you can connect the hose to a water source. Measure the length of the hose and diameter unless they are already known from the manufacturer.
In Class: Move the class to the area of the water source. This may require a short trip down the hall or outside. If necessary, have students operate the hose, faucet, and watch. Turn on the water and time how long it takes to fill the bucket to a predetermined volume. When this is complete, move back into the classroom. From this point, the students can calculate many different parameters with simple data obtained during the experiment. Using the equations listed above students can calculate the volumetric flow rate and mean velocity. With data tables on water properties, they can calculate the Reynolds number for the flow. With a Moody diagram and information about the hose material, they can then determine the friction factor and calculate head losses.
Observations: Students will get a better sense of what a certain volumetric flow rate and velocity looks and sounds like. Often students do not have a sense of how ‘fast’ or ‘slow’ a volumetric flow rate is. They will also understand what constitutes turbulent flow as the water will likely be turbulent if it fills the entire hose (required for internal flow analysis).
Additional Application: If more accuracy is desirable, a thermometer can be used to measure the temperature of the water. This will help determine the density of the water to calculate the Reynolds number. In addition, you can add minor losses by accounting for any junctions, fittings, or valves along the flow. Finally, to enable students to see how changing the diameter of the hose affects parameters such as Reynolds number and losses, you can use a smaller or larger hose and repeat the experiment.